Quick Start
This tutorial will walk you through owns simple backups and a restore.

|
Quick Start
|
|
This chapter introduces you to basic WestNet Backup's backup and restore operations and walks you through a tutorial in which you perform your own simple backups and a restore. You may not learn the terminology used in this manual, but do not worry - it's not necessary to know these terms for this chapter. Just follow along!
Prepare a Backup Set
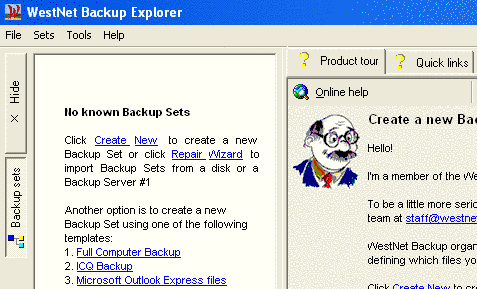
Start WestNet Backup by selecting WestNet Backup Explorer item at the "Start - Programs - WestNet - WestNet Backup" menu. The main window of WestNet Backup Explorer will appear. It contains 2 parts: left resizable docked panel with a tree of all existing Backup Sets and an information window at the right side of the window. The content of the information window depends on the selected item at the left docked panel.
|
At the first startup, there is no known Backup Sets and the main window will look like the image. WestNet Backup works with data organized in Backup Sets. To backup or restore your data, you need to create a Backup Set defining which files to operate with, where to backup them, and when to update the backup. That's why you have to create a new Backup Set. You can:
|
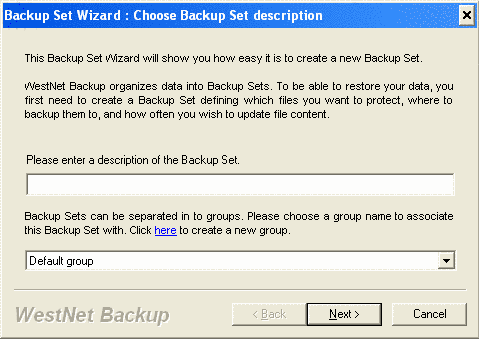
A new Backup Set Wizard will appear. The first page introduces you in the Backup Set concept and allows to enter a description for a new Backup Set and its group.
|
Each Backup Set must have a unique description that will be used to identify this Backup Set on a backup media. It has to contain up to 50 symbols, digits or spaces. Enter a description for the Backup Set at the field. To make your work easier with many Backup Sets, you can separate them in to groups. That's pure logical division and does not affect backup or restore operations. Just select your group at the combobox. Click the Next button to accept the entered description and proceed. |

|
The next step to prepare the Backup Set is to specify files to backup.
This page allows you to include and exclude files, folders and registry keys to/from backup.
When you add a new Backup Set, all boxes are white.
You can include folders, registry keys, or files to backup by clicking on
checkmarks near a folder or a file. The selected folders, files and registry
keys have a white box with a red check.
|
Select few folders to backup. To preview a list of the selected files, press the button "Show list of files to backup". Click the Next button to accept the selected files and folders, and proceed.
|
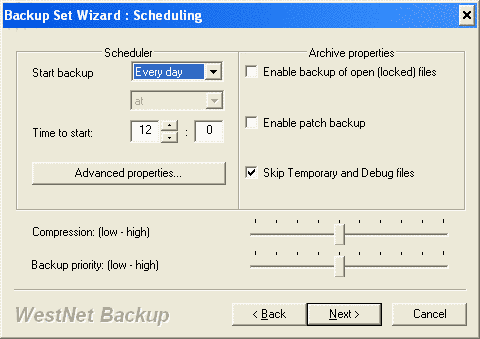
When you have selected which files you want to backup and where, you have to specify how often you would like to start automatic backups of this Backup Set and how backups will work. At the Start backup combobox select one of the values. For now, just select "Every day" item. It means WestNet Backup will start a backup of this Backup Set every day at the time specified at the "Time to start" fields. All other default settings are useful for most backups. Read Backup Set Wizard Overview to find our more about them. Click the Next button to proceed. |
|
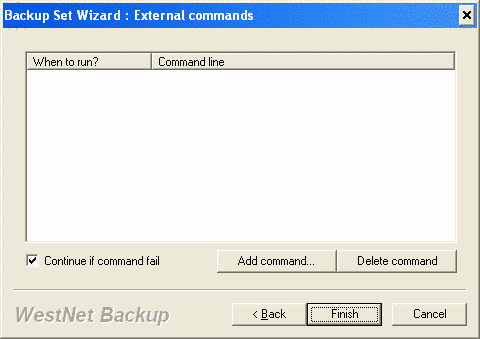
WestNet Backup gives you unlimited customization of the backup process through the use of external commands. External command is an external executable file that can process different operations with source and archive files before, during, and after backup. Here you can add a number of external commands to execute in the different events of backup process. But for now, do not add any. Click the Finish button to save the Backup Set. |
|
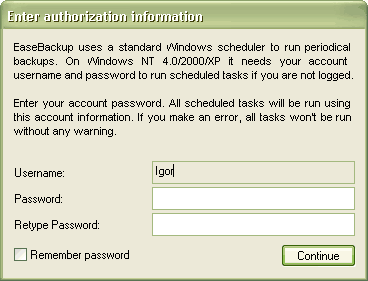
WestNet Backup uses the standard Windows scheduler to run periodical (automatic) backups. If you use Windows NT/2000/XP, it's necessary to enter your Windows account username and password. If you make a mistake, Windows won't be able to run your periodical backups. Click the Continue button. WestNet Backup will create or edit all necessary scheduled tasks by itself. When the Backup Set is saved, WestNet Backup will ask you "Start backup process right now?". Press YES button. |
Your first backup
|
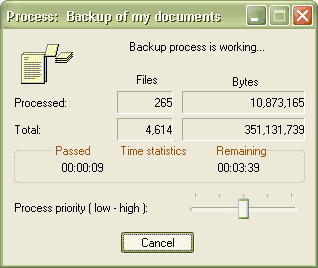
During any backup or restore process, WestNet Backup shows a status window with all necessary information about the process. Title of the status window contains a description of a Backup Set. Wait until backup process is finished. If there were not any errors or warnings during the process, WestNet Backup will show a confirmation box "Your files were successfully backed up!". Otherwise, it will show you a dialog box with a log of the process. |
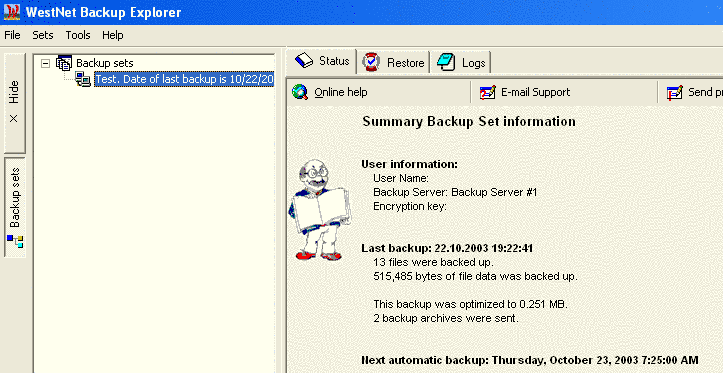
When the backup process is finished, the main window of WestNet Backup Explorer should look like the image below. My congratulations! Your first backup has been done!
Quick incremental backup
Exit WestNet Backup. Make some duplicates of some files in the folders you backed up. Make sure the names are different from the originals. Also you can make some new documents using your word processor or any other application you know well. Do not make them complicated; you need just few simple changed and new files.
|
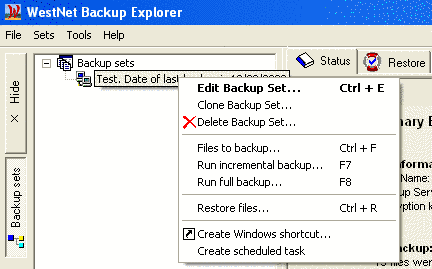
Start WestNet Backup and right click on your Backup Set. A context-sensitive menu will appear. Select Run incremental backup... command to start backup of only new or changed files. It will take much less time than the first backup. The same status window will appear again. Wait until this quick incremental backup is finished. Congratulations on your second backup! If you would like, you can get a list of new and changed files. Use Files to backup... command for this. A dialog box with these files will appear. |
Quick restore
So we just backed up some files. Lets assume you have lost some or all of these files and you need to recover them.
Start WestNet Backup and select your Backup Set at the left docked panel. Four tabbed panels ("Status", "Backup", "Restore" and "Logs") will appear at the information window. To restore your files you have to activate Restore panel. It contains the tree of all backed up files of the selected Backup Set (see image below).
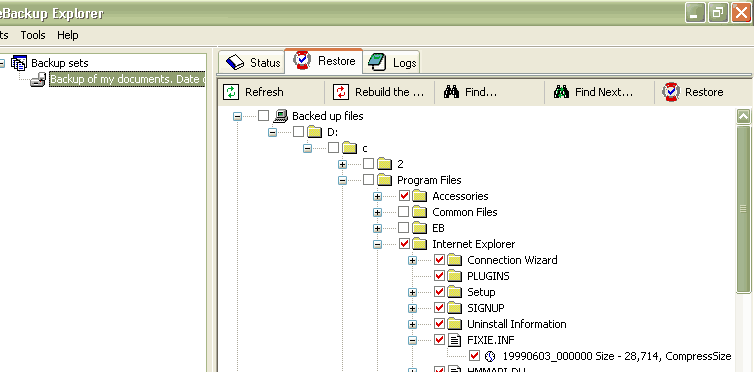
You have to select the files you want to restore (click on a checkmark near a file or folder). If you want to restore all files and folders, do not select any files. When all necessary files are selected, press Restore button to start the restore process. A Restore Wizard will appear. Walk through it without changing anything to restore the selected files to their original location.
Preparing for disaster
If you follow the Quick Start chapter and make a complete backup of all your files, you have to prepare your system for later restore your entire computer if it ever stops working. See Preparing for disaster chapter.